1. Start the Application.
2. Again, you can select the language to use. And again, I suggest using English, as this makes the guide easier to follow.
3. Then define a new rule set, right click “Rules”. A pop up menu will appear. Select “Add Rule Set” from this menu. On screen, it looks as follows:

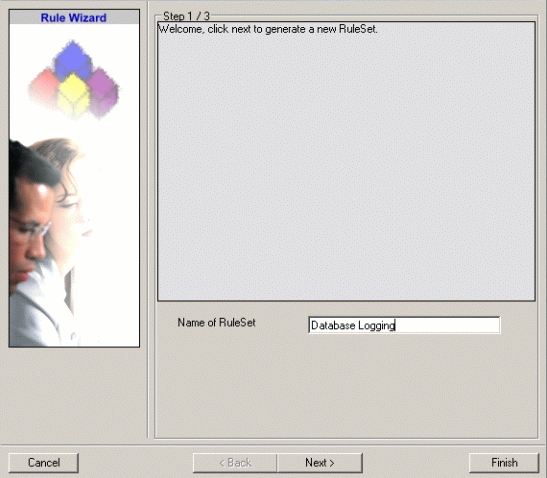
4. Then, a wizard starts. Change the name of the rule to whatever name you like. We will use “Database Logging” in this example. The screen looks as follow:
Click “Next”. A new wizard page appears as appeared in the case of EventReporter. Select only Database Logging here. Do not select any other options for this example. Also, leave the “Create a Rule for each of the following actions” setting selected. Click “Next”. You will see a confirmation page as showned in the case of EventReporter and there you have to click Finish.
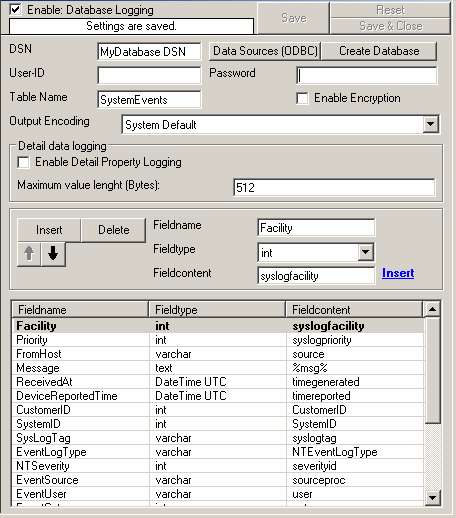
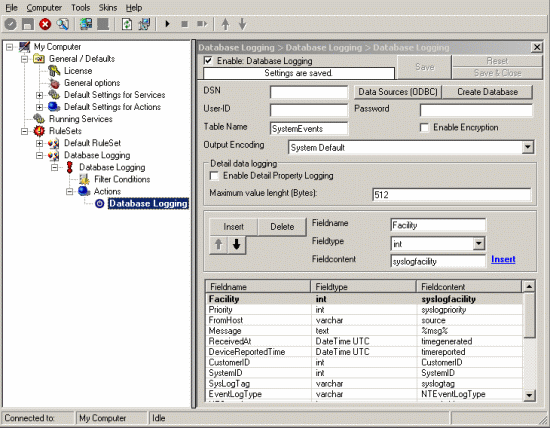
5. After above steps you will see that the new Rule Set “Database Logging” is present. Please expand it in the tree view until the action level of the “Database Logging” Rule and select the “Database Logging” action to configure.
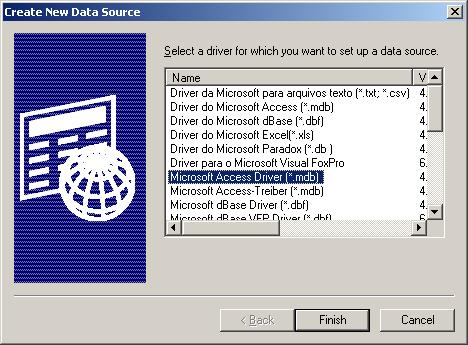
6. Now click on the Data Sources (ODBC) button to open the ODBC Data Source Administrator. Then choose the “System DSN” tab and click the “Add” button to add a new System-DSN (Select the Microsoft Access driver like in the screenshot below).
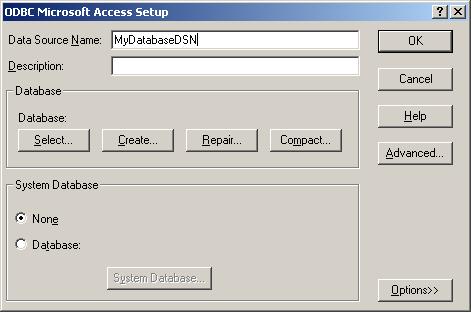
8. In the next step, click the “Select button” and go to the application installation directory (Usually C:\program files\instalationfolder\) and choose the sample database called sample97.mdb. After that name the new DSN with “MyDatabaseDSN” like in the following screenshot and press OK.
9. Now close the ODBC Data Source Administrator and switch back to the application client and insert “MyDatabaseDSN” in the DSN field. Leave all other settings in their default and save the changes.