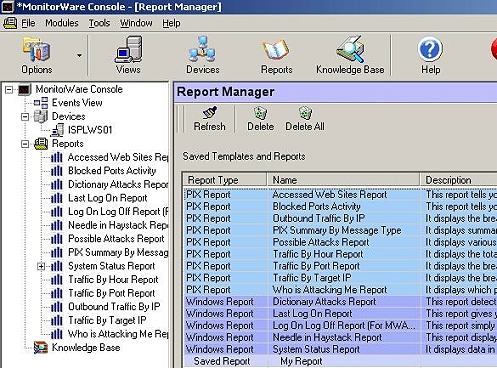
1. Once MonitorWare Console 2.0 is opened, on the left hand side, you can see a tree view with a node called “Reports”. Click on that node. It will show you the list of available reports under it as well as on the right hand side. You will see something similar to the following figure:

In order to update a filter it’s necessary that you have a previously saved report in which you had applied filters. I would be using the Saved Report entitled as “My Report” using the System Status Report Template. This report was generated during “How do I add filters for Database Reports?” guide.
2. Previously a report in “How do I add filters for Database Reports?” guide was generated where we assumed that we were interested to generate a report where the “DeviceReportedTime is greater than 4/13/2004 3:43:20 PM”, “EventSource is equal to Security” and, “EventId isn’t one of 105, 108 and 114”.
3. Later on in “How do I update filters for Database Reports?” guide we updated the filter condition as “DeviceReportedTime is greater than 4/13/2004 3:43:20 PM”, “”EventSource is equal to Adiscon EvntSLog” and, “EventId isn’t one of 105, 108 and 114”.
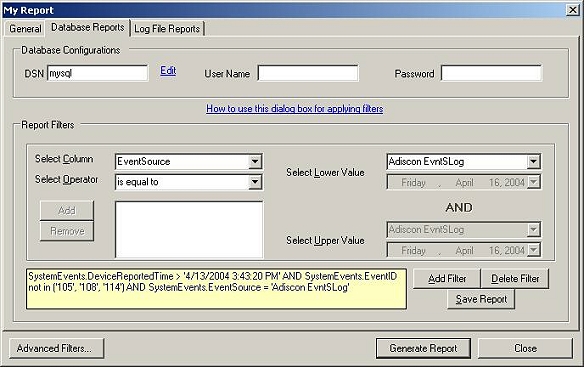
4. Double click on the “My Report” Saved Report, Adding Filter Forms would pop up. Switch to “Database Report Tab”. Once done the following form will be displayed:

5. The main options on this form are previously explained in “How do I add filters for Database Reports?” guide.
6. Let’s assume that you want to delete one of the filters in the previous set of filters.
7. Assuming that you want to delete the EventSource Filter i.e. “EventSource is equal to Adiscon EvntSLog”.
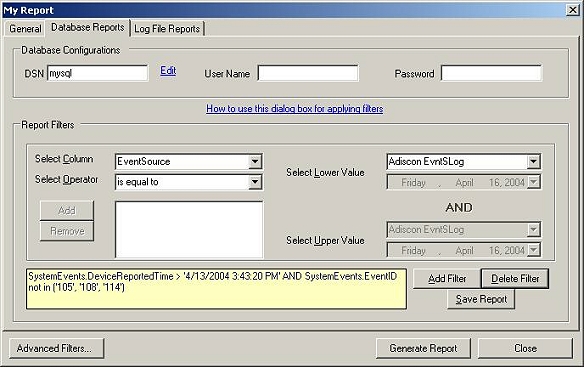
8. Select “EventSource” from the “Select Column” combo box. The other control on the form automatically display the rest of the values. Press “Delete Filter” button. In the end your Report Filters form should look something like this:

Note: In order to delete a specific filter on a desired column you need to select the column. For example If you want to delete “EventSource” then you have to select this column. Once you have selected the column, press “Delete Filter” button. The changes will be mirrored automatically in the Query Display area (the yellow area in the form) when the “Delete Filter” button is pressed.
9. When you press the “Generate Report” button it will open up a report in HTML format in which changes applied to the filters conditions are apparent:
9. We can also save this report as well. This has been previously explained in “How do I add filters for Database Reports?” guide.
10. You can even schedule this saved report on the daily basis!
