1. Start the Application.
2. Select your language – in this example, I use English, so it might be a good idea to choose English even if that is not your preference. You can change it any time later, but using English makes it much easier to follow this guide here.
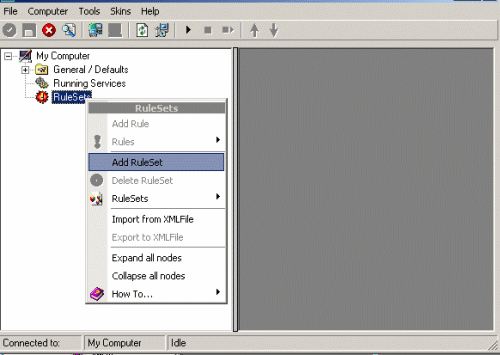
3. Then define a new rule set, right click “Rules”. A pop up menu will appear. Select “Add Rule Set” from this menu. On screen, it looks as follows:
4. Then, a wizard starts. Change the name of the rule to whatever name you like. We will use “Forward SETP” in this example. The screen looks as follow:

Click “Next”. A new wizard page appears.
5. Select only Forward by SETP. Do not select any other options for this sample. Also, leave the “Create a Rule for each of the following actions” setting selected. Click “Next”. You will see a confirmation page. Click “Finish” to create the rule set.
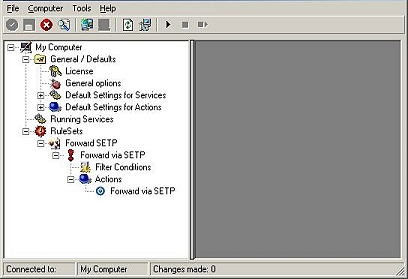
6. As you can see, the new Rule Set “Forward SETP” is present. Please expand it in the tree view until the action level of the “Forward SETP” Rule and select the “Forward by SETP” action to configure.
7. Now, type the IP address or host name of our central hub server in the “Servername” field:
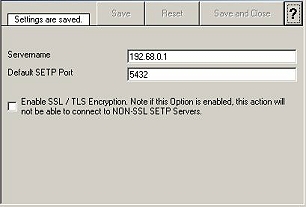
8. Make sure you press the “Save” button – otherwise your changes will not be applied.