What are the settings that I would have to make such that php-syslog-ng can create Reports from MonitorWare Products?
There are a few things that have to be set in order to get php-syslog-ng running with MonitorWare products for Reporting purposes.
Note: To view reports via php-syslog-ng, you need a local web server (for example Microsoft’s IIS or Apache) and must have installed PHP. Please make sure you log on with a sufficiently privileged user account. Please also make sure to have installed and configured an EventReporter or MWAgent with an EventLogMonitor and Database Logging Action.
1. Download the latest version of php-syslog-ng
To do so, please visit the official Site of php-syslog-ng at http://www.vermeer.org (currently unavailable). You will find download under “Projects” -> “php-syslog-ng”. Follow the links and download the package:
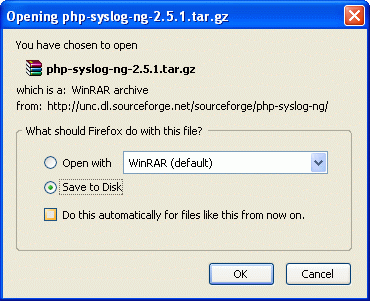
Figure 1: download php-syslog-ng
2. Unzip the downloaded Package
After successful downloading, please rightclick on the *.tar.gz package and Extract its content with a tool like WinRAR or WinZIP:
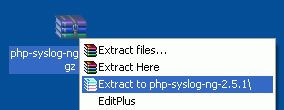
Figure 2: extract downloaded files
3. Copy the neccessary Files to your Webserver
Copy the content of the “web” subfolder to your webservers root folder. Let us assume you use Apache and run it in the default configuration. Then, your web pages are stored in the c:\program files\apache group\apache\htdocs directory. Copy the content of the “web” subfolder into this directory. Note: Do NOT copy the whole “web” folder, only its content! Now you can access php-syslog-ng via http://localhost/index.php but it will still bring up some errors.

Figure 3: copy the web folder content
4. Creating the Database
In the next Step, go to your Database Administration Tool (i.e. PHPMyAdmin or SQL Enterprise Manager) and create a Database named “syslog”. Create the logs table with the following SQL Statement into this database:
- CREATE TABLE logs (
host varchar(32) default NULL,
facility varchar(10) default NULL,
priority varchar(10) default NULL,
level varchar(10) default NULL,
tag varchar(10) default NULL,
date date default NULL,
time time default NULL,
program varchar(15) default NULL,
msg text,
seq int(10) unsigned NOT NULL auto_increment,PRIMARY KEY (seq),
KEY host (host),
KEY seq (seq),
KEY program (program),
KEY time (time),
KEY date (date),
KEY priority (priority),
KEY facility (facility)
) TYPE=MyISAM;
5. Creating the System DSN
Now we must create a System DSN for our newly created Database, so that we can log into the logs table with i.e. MonitorWare Agent. To do so, go to “Control Panel” -> “Administrative Tools” -> “Data Sources (ODBC)” and click on “System DSN”, the following screen should appear:
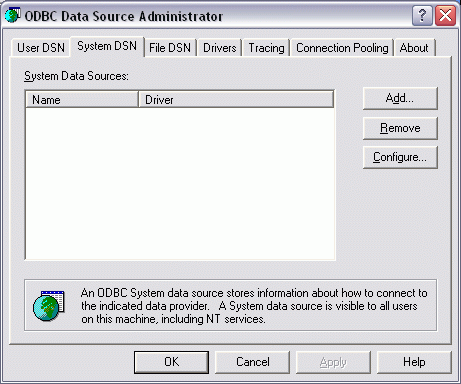
Figure 4: creating DSN step 1
Click on “Add” on the screen above and select your database specific driver from the screen below (in our case it is the “ODBC 3.51 Driver” because we are using MySQL):
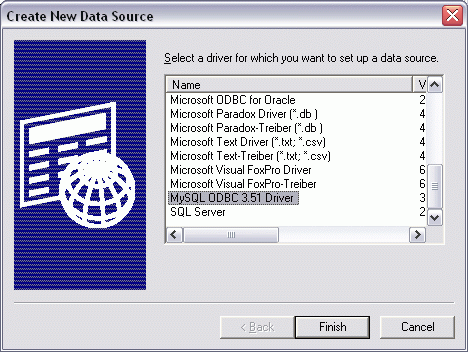
Figure 5: creating DSN step 2
Click on finish. Enter “syslog” as “Data Source Name”, your username and password and select your database in the upcoming popup:
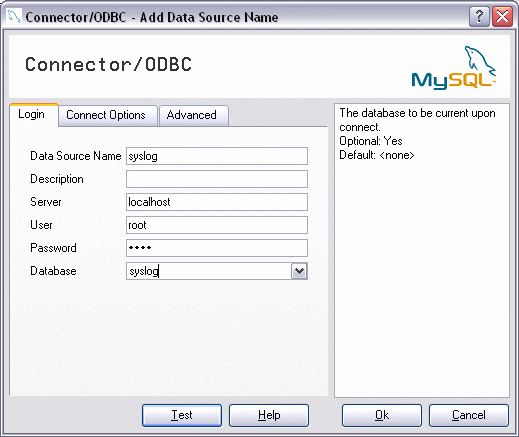
Figure 6: creating DSN step 3
Click on “Test” and the following screen, which says connection was succesfully made, should appear (If not, please go back and check all steps):
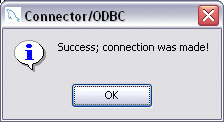
Figure 7: creating DSN step 4
Select “OK”. Your DSN is now created:
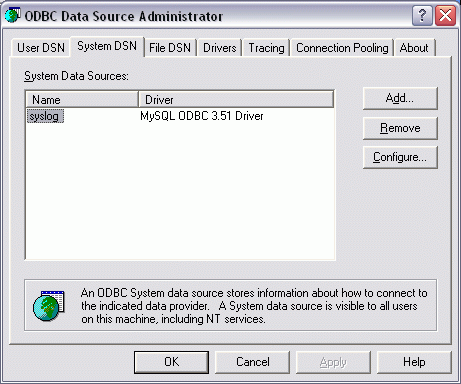
Figure 8: creating DSN step 5
6. Editing the db_fns.php file
After creating the System DSN, open up the db_fns.php file, which can be found in the “includes” folder, with a php-editor of your choice
(I will use EditPlus in this Sample) and change the username and password:
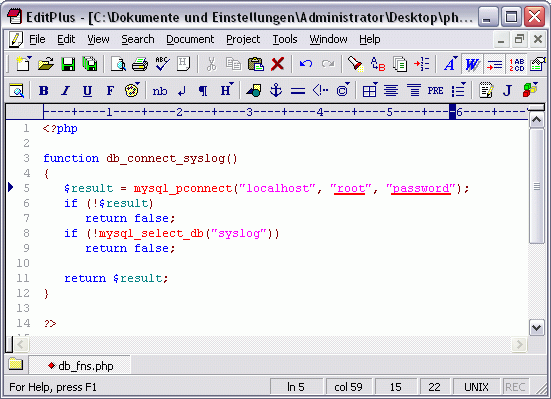
Figure 9: editing the config file
7. Testing php-syslog-ng
Please open up php-syslog-ng now, in our case via http://localhost/index.php, and test if the appearing site looks like the one shown below. If there are any errors, you have done something wrong. In this case go back to step 1 and check all the settings. Do not click on search yet, because there is currently no data in the database.
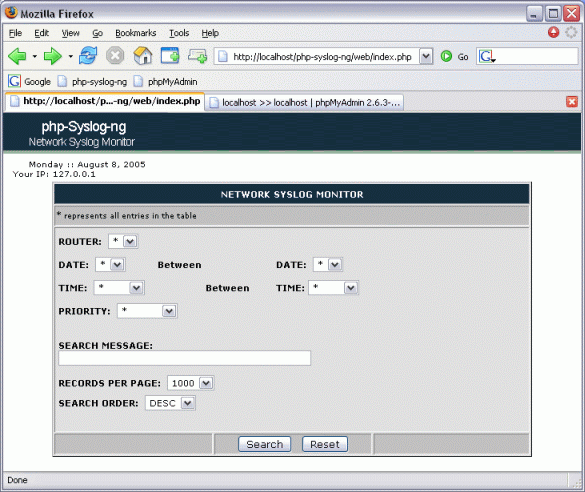
Figure 10: php-syslog-ng
8. Configuring Database Logging Action
First, please delete all pre-configured fields in the database logging action of your MWAgent/EventReporter. To do this, click on every field and press the “Delete” button:
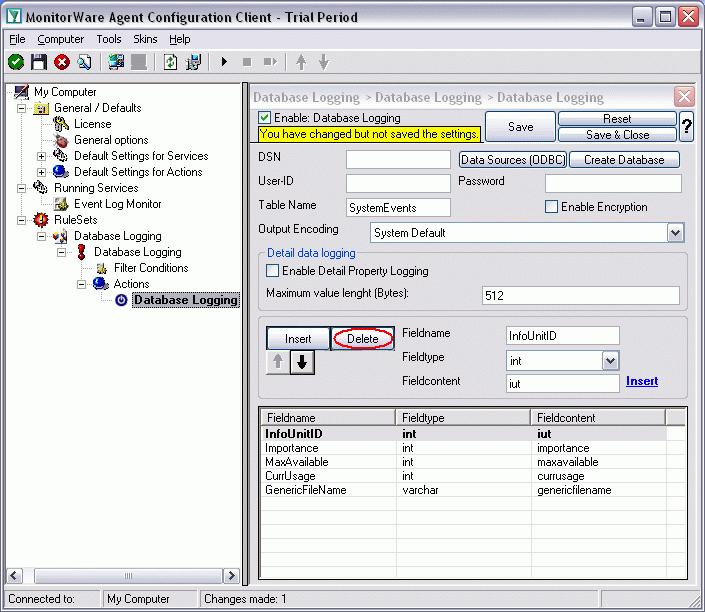
Figure 11: configuring database logging step 1
After you deleted all fields, please enter “syslog” as the dsn to use, “logs” as the table name and type in your username and password. Click on Save:
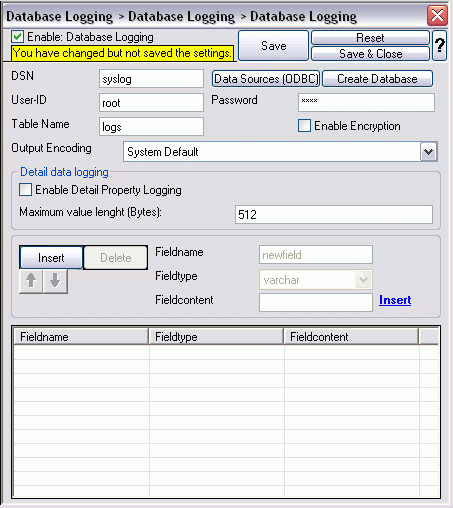
Figure 12: configuring database logging step 2
Now create all the neccessary fields for php-syslog-ng. Click on the “Insert” button, rename the first field to “host”, select varchar as fieldtype and click on the blue “Insert” to get a list of all properties. Select “General”, then “Source”:
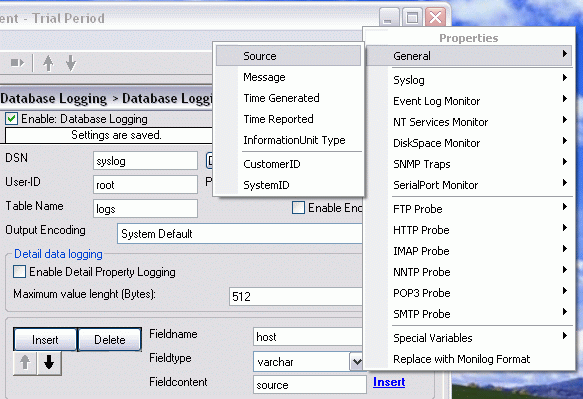
Figure 13: configuring database logging step 3
Repeat this, until you have configured all fields as shown in the screenshot below. Press “Save” and then restart the service:
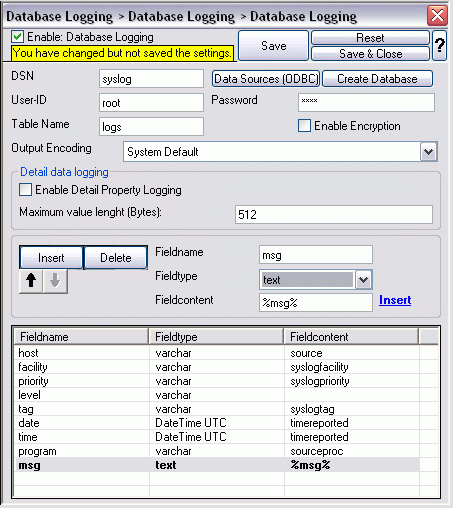
Figure 14: configuring database logging step 4
9. php-syslog-ng
If you have configured a File- or EventLog Monitor now, which forwards his data to the file logging action we created above, the data will be logged into the “logs” table in our custom format. To get an overview of all those, start php-syslog-ng. In our case it can be started via http://localhost/index.php. Configure from which host (if you have more than one) you want to see the data and press “Search”:
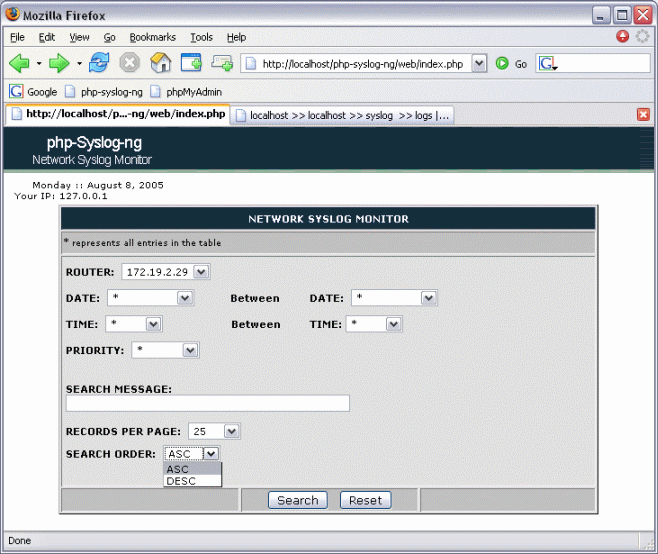
Figure 15: configuring php-syslog-ng
After pressing “Search” you will see a page like the one shown below. You are done:
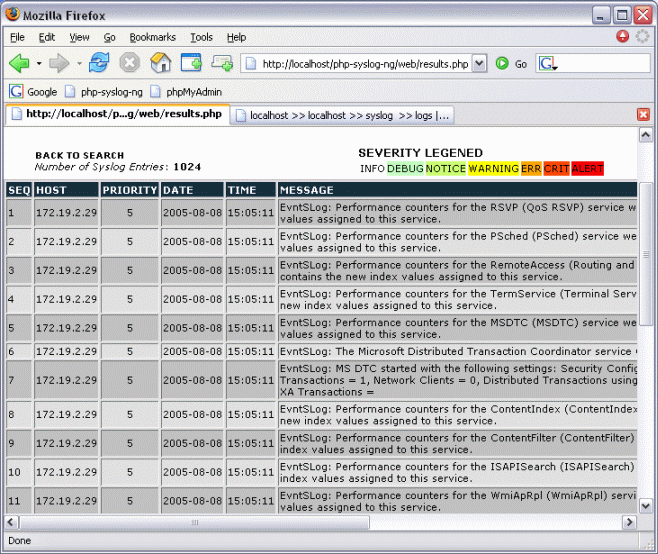
Figure 16: php-syslog-ng
With the above mentioned settings, php-syslog-ng will successfully generate the report from MonitorWare Products.
