Tutorial: Integrate WinSyslog with a Custom Database Schema#
Use this tutorial when WinSyslog should write into an existing database schema
instead of the built-in SystemEvents layout.
If you want the fastest first success path, start with Quick Start: Write Syslog Messages to Microsoft SQL Server first and return here when you need to adapt the database layout to an existing application.
Question#
How do I write WinSyslog data into an existing custom SQL table?
Answer#
Use an ODBC System DSN, point WinSyslog at the existing table, replace the default field list with the columns from your schema, and verify the insert with a test message. This path is for existing databases, not for first-time setup.
At a glance#
Use this page only when the schema already exists
Keep the target table fixed and map each column deliberately
Test the DSN before debugging WinSyslog
Verify with one matching message and one SQL query
Goal#
At the end of this procedure, WinSyslog will write matching messages into your own destination table through an ODBC System DSN.
When to choose this tutorial#
Use this path when:
your organization already has a fixed database schema
another application expects specific column names or data types
you want WinSyslog to feed an existing integration or reporting database
Do not use this path just because database logging exists. If you want the fastest supported setup or a ready-made example, use Quick Start: Write Syslog Messages to Microsoft SQL Server instead.
What this tutorial does not do#
This tutorial does not design your schema for you. WinSyslog can write to your table, but you must decide the table design, column definitions, indexes, retention strategy, and downstream reporting logic.
Prerequisites#
A reachable database server and a tested ODBC System DSN
A destination table that already exists
Database credentials with permission to insert rows into that table
A clear mapping from WinSyslog properties to the destination columns
Example target table#
The exact schema is up to you. For a Microsoft SQL Server example, a custom table could look like this:
CREATE TABLE dbo.IncomingSyslog (
    received_at datetime2 NOT NULL,
    source_host nvarchar(255) NOT NULL,
    facility_text nvarchar(32) NULL,
    severity_text nvarchar(32) NULL,
    app_name nvarchar(128) NULL,
    raw_message nvarchar(max) NULL,
    message_text nvarchar(max) NOT NULL
);
Sample message and output#
This example uses the same RFC 5424-style message as the quick start so you can compare the default and custom-schema paths directly.
Sample input message:
<134>1 2026-04-01T08:15:00Z fw01 sshd 1234 ID47 - Accepted password for alice from 192.0.2.10 port 55221
Expected output in the example custom table:
received_at   = 2026-04-01 08:15:00
source_host   = fw01
facility_text = Local0
severity_text = Informational
app_name      = sshd
raw_message   = <134>1 2026-04-01T08:15:00Z fw01 sshd 1234 ID47 - Accepted password for alice from 192.0.2.10 port 55221
message_text  = Accepted password for alice from 192.0.2.10 port 55221
Steps#
Review the destination schema before opening WinSyslog.
Confirm the exact table name.
Confirm each destination column name and data type.
Decide which WinSyslog property belongs in each column.
Decide whether you want to keep the raw message, the parsed message text, or both.
Create and test an ODBC System DSN for the target database.
The DSN must point to the database that already contains your destination table.
Complete the DSN wizard and use its built-in test before you continue.
If the DSN uses Windows authentication, remember that WinSyslog normally runs under the default Windows
Local Systemservice account unless you changed it. A DSN test that succeeds for the interactive admin user does not prove that the WinSyslog service can connect to the same SQL Server instance and database.For a remote SQL Server, either grant SQL access to the WinSyslog service account context, change the WinSyslog service to run under an account that already has SQL access, or use SQL authentication instead.
Create or choose the ruleset whose messages should be stored.
If you are starting from scratch, create a dedicated ruleset for the database action.
Bind the receiving service to that same ruleset before you test inserts.
If you already use an existing ruleset, confirm that the service that receives the message is bound to the ruleset that holds the database action.
Add a Write to Database action to that ruleset.
Configure the connection settings.
Select the ODBC System DSN.
Enter credentials if the DSN or driver requires them.
Use Verify Database to confirm connectivity.
Point the action to the existing destination table.
Enter the custom table name.
Do not use Create Database for this path unless you intentionally want the built-in default schema instead of your own table.
Replace the default field list with mappings that match your schema.
For the example table above, a practical starting point is:
received_at->DateTime->timereportedsource_host->varchar->sourcefacility_text->varchar->syslogfacility_textseverity_text->varchar->syslogpriority_textapp_name->varchar->syslogappnameraw_message->text->rawsyslogmsgmessage_text->text->msgPropertyDescribed
If a string column is shorter than the source property, use the property replacer to truncate or transform the value deliberately. For example,
%msg:1:200%stores only the first 200 characters of the message.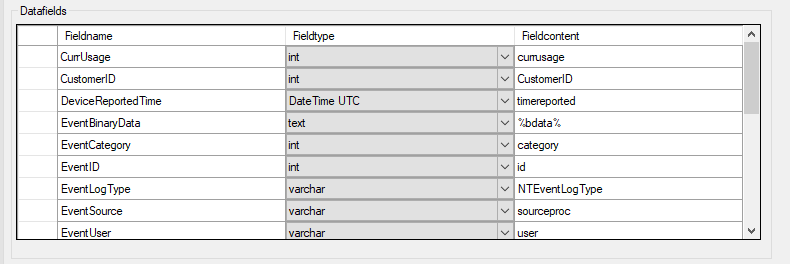
The datafields tab is where you replace the default mapping with the column names, data types, and event properties that match your own schema.
Save and apply the configuration.
Restart the WinSyslog service if your environment or workflow requires it.
Send or receive a matching test message.
Query the destination table and verify the inserted data.
SELECT TOP (10)
    received_at,
    source_host,
    facility_text,
    severity_text,
    app_name,
    raw_message,
    message_text
FROM dbo.IncomingSyslog;
Verification#
The ODBC System DSN test succeeds.
The action’s Verify Database button succeeds.
A test message inserts a row into the existing custom table.
Each value appears in the expected destination column with the expected data type and length.
Common issues#
Leaving the default field list unchanged while targeting a custom table
Using the wrong field type for a destination column
Forgetting that long text may not fit into a short
varcharcolumnClicking Create Database even though the goal is an existing custom schema
Assuming Adiscon tools that expect the default schema will continue to work unchanged against the custom table
Forgetting to test the DSN outside WinSyslog before debugging the action
Mapping
msgto a short column when the real message text is longer than the destination can hold
Next step#
If you later decide that you need the built-in Adiscon table layout instead of your own schema, switch to Quick Start: Write Syslog Messages to Microsoft SQL Server.